
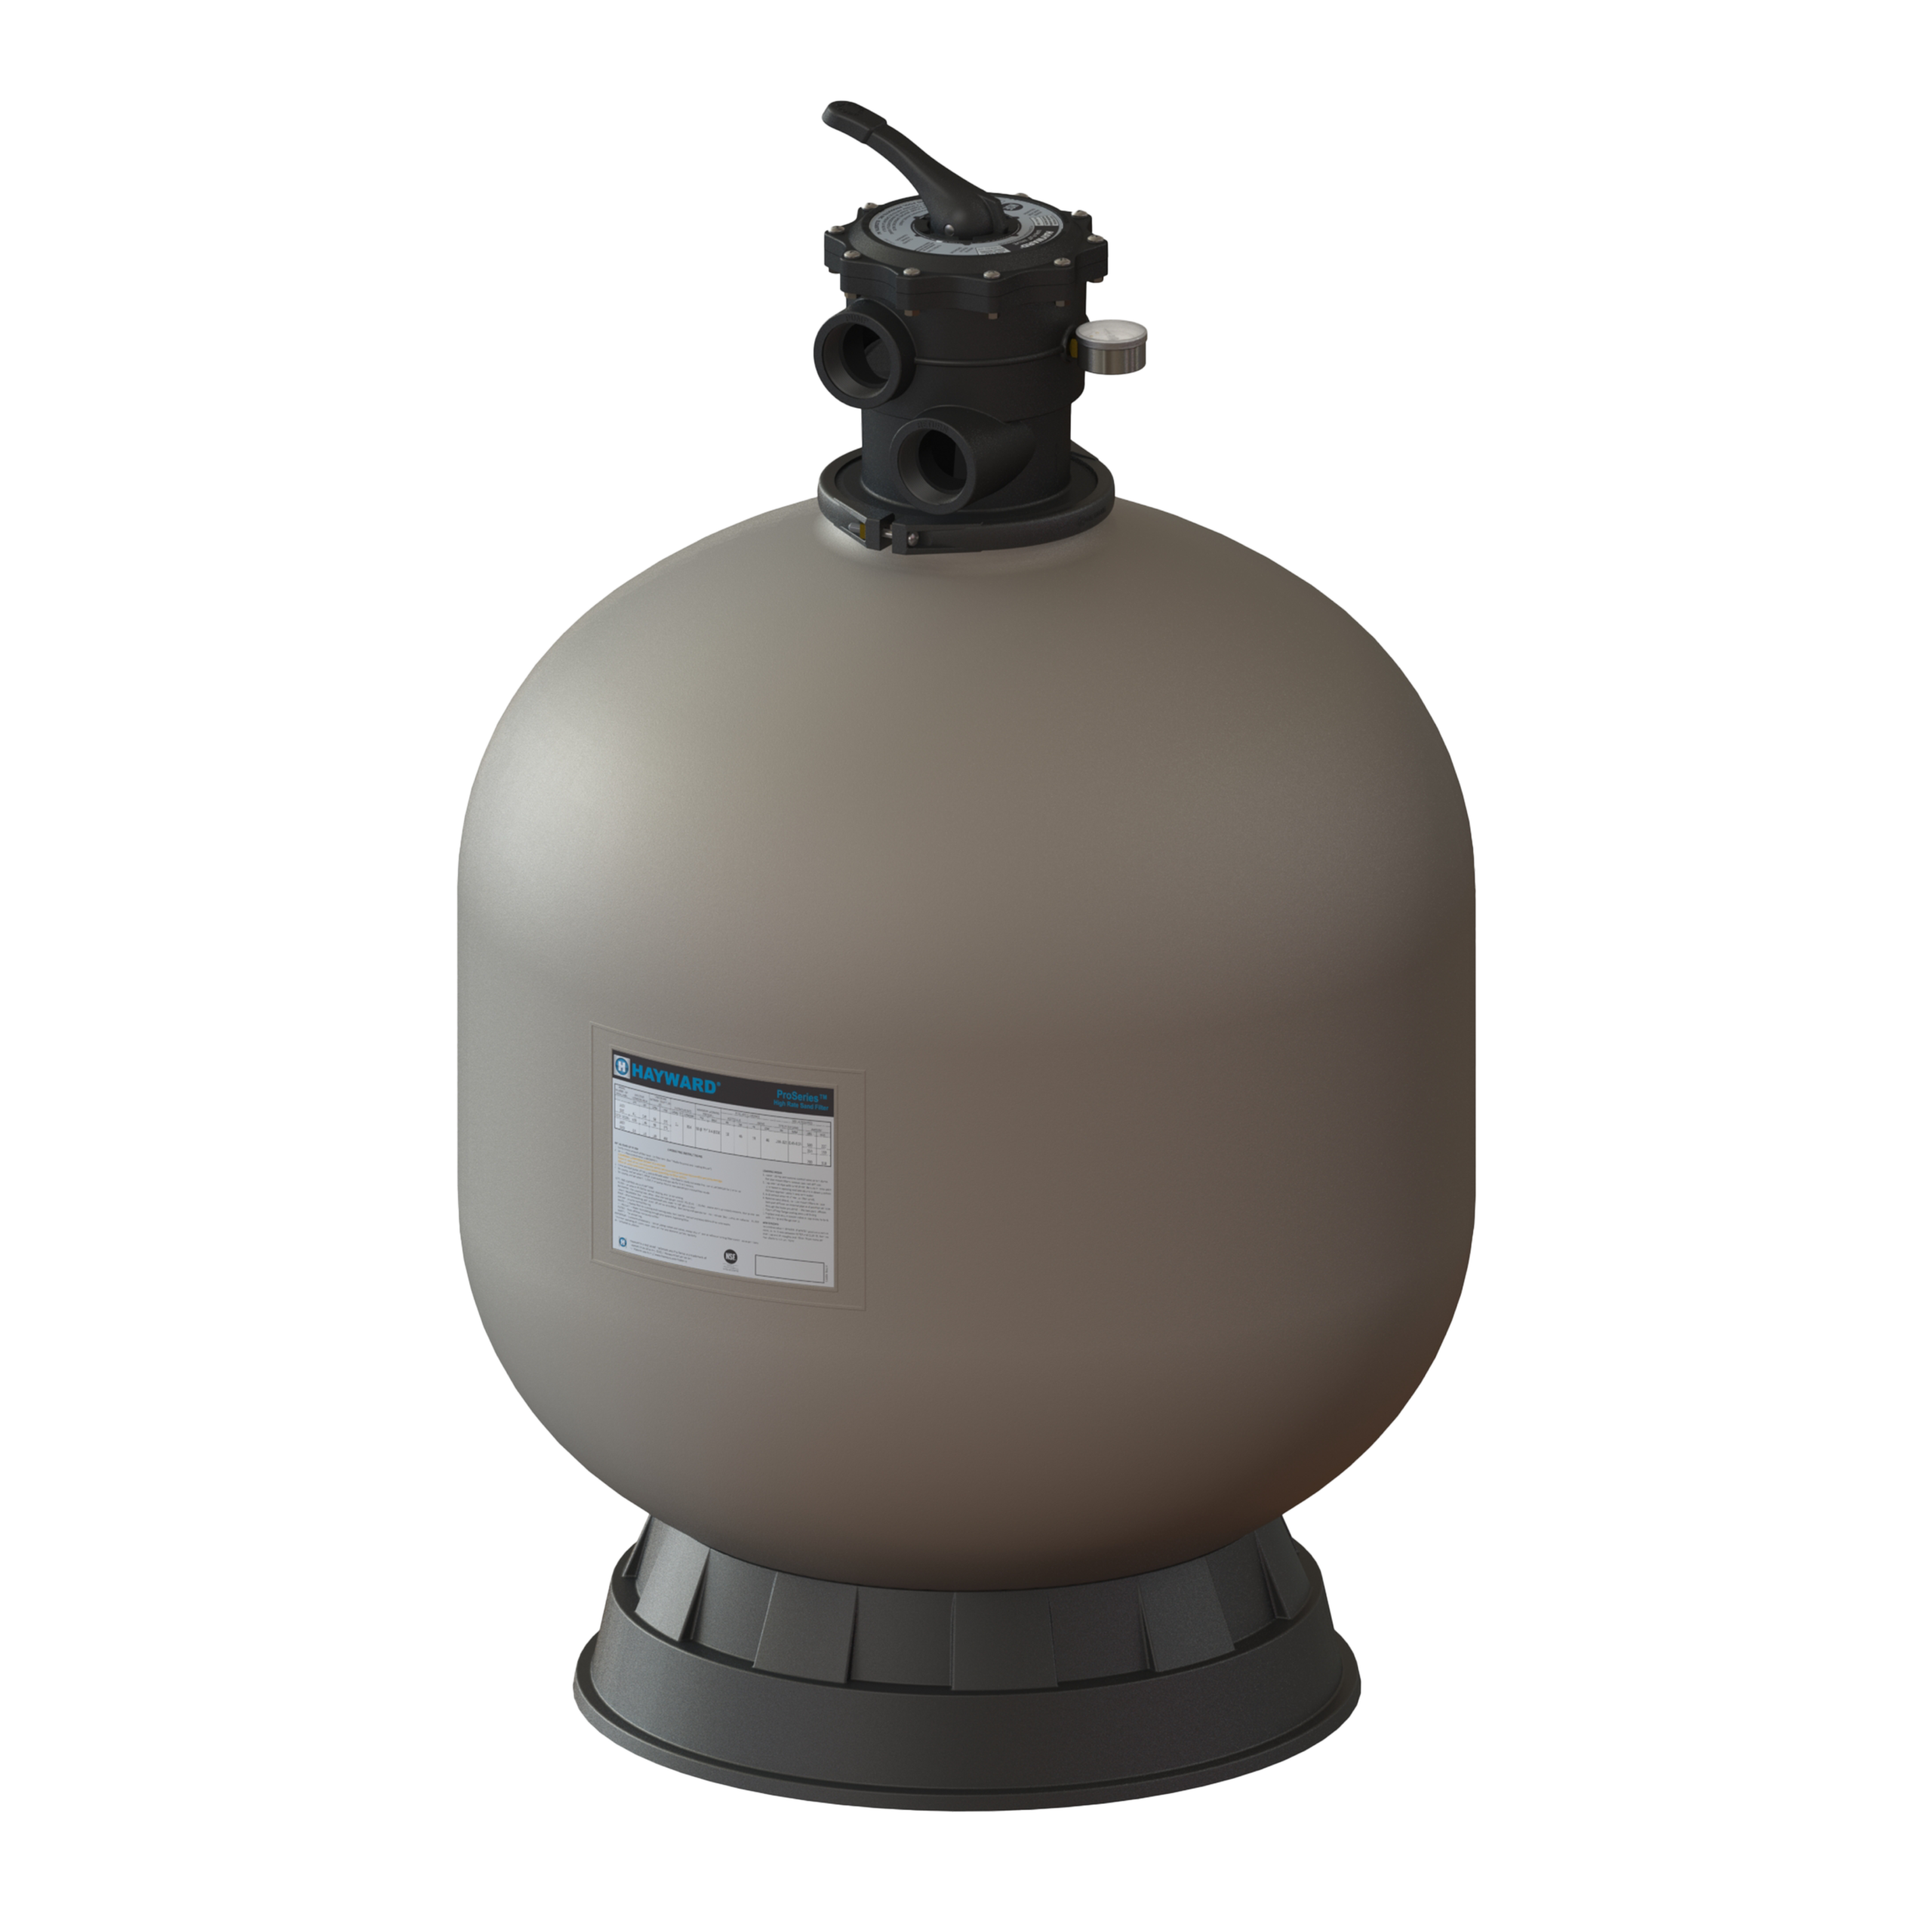
Description
Hayward Sand Filter – Swimming Pool Filtration System
General Description
The Hayward Sand Filter is designed to provide efficient filtration for swimming pools by removing suspended particles, dirt, and impurities from pool water. It helps maintain clean, clear water and supports reliable swimming pool circulation and filtration.
Technical Specifications
Brand: Hayward
Product Type: Sand Filter for Swimming Pools
Brand Origin: SPAIN
Filtration Media: Filter-grade silica sand or other compatible filtration media.
Operating System: Designed to operate with a compatible swimming pool circulation pump.
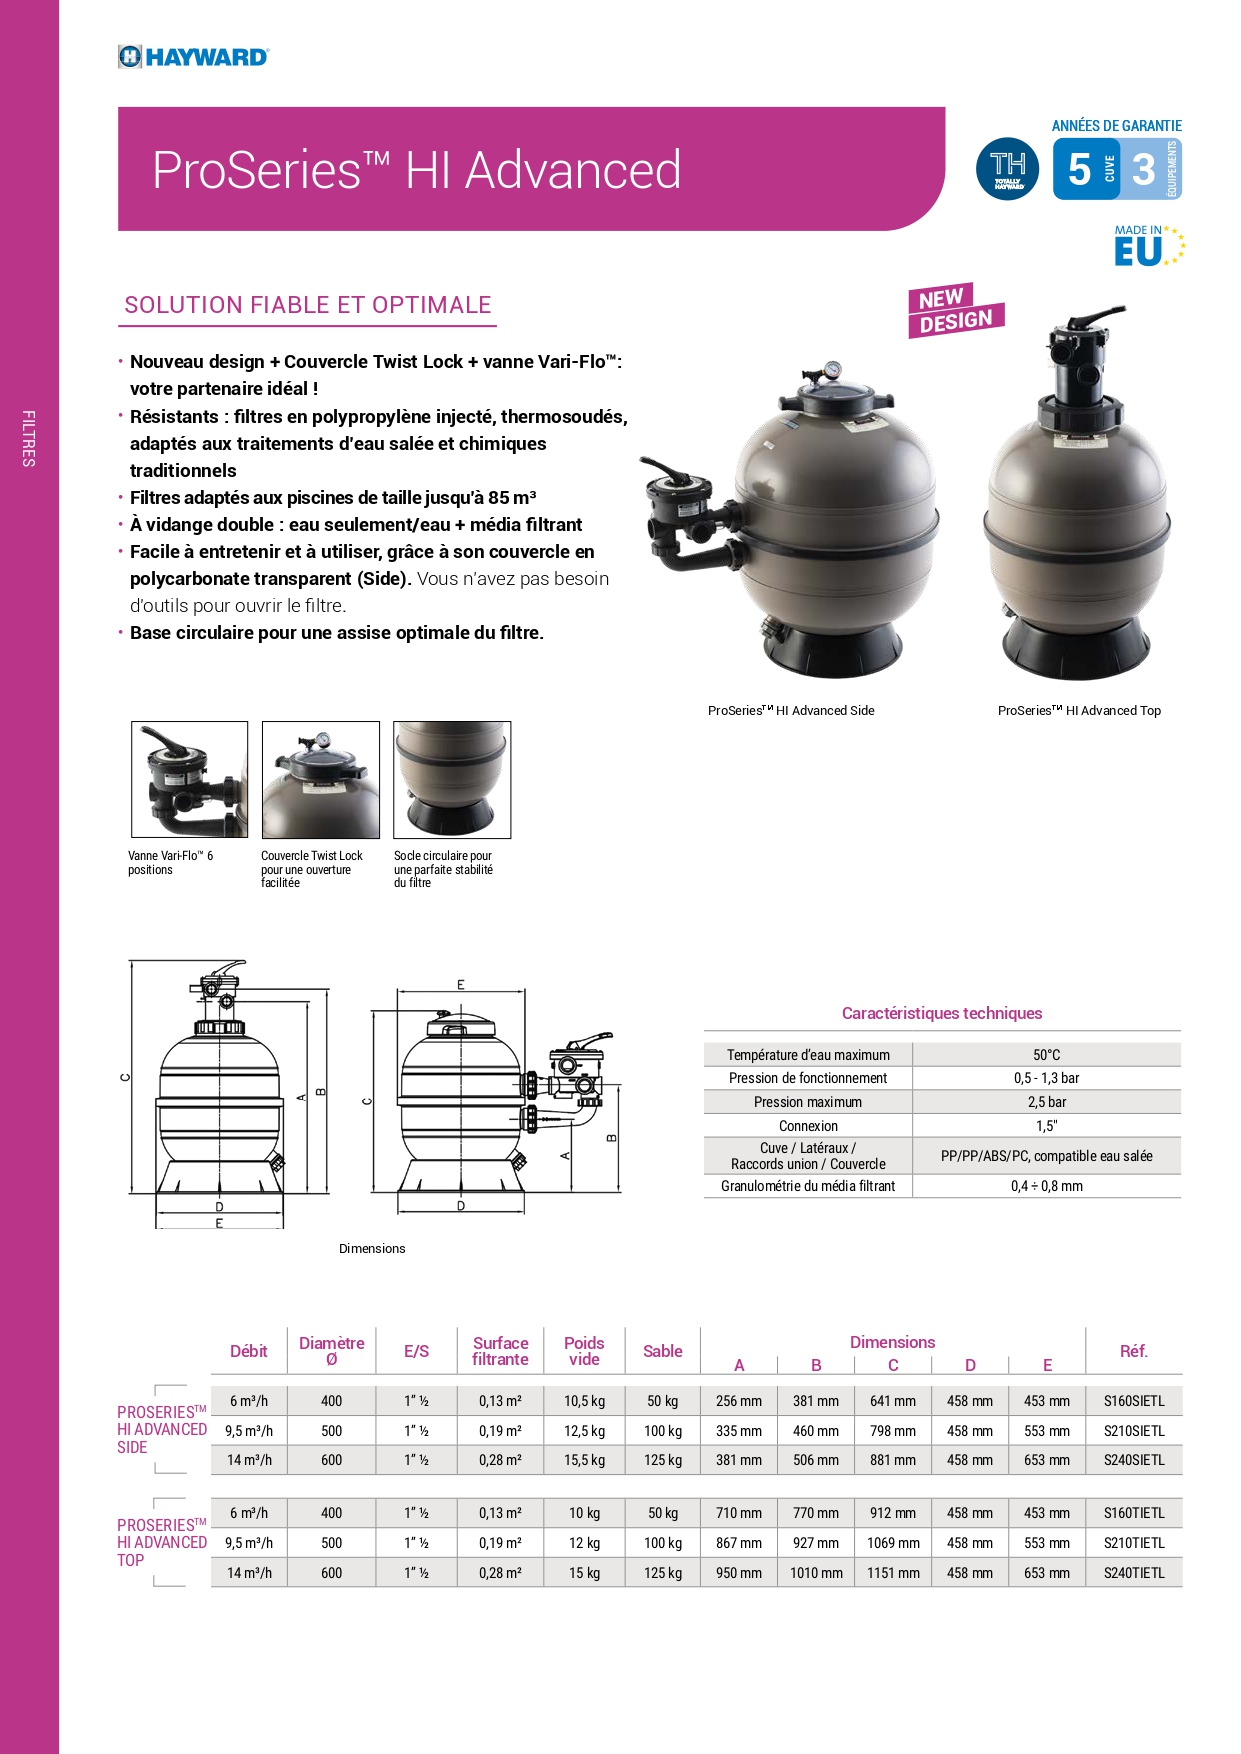
Valve Type: Multiport valve, available in top-mount or side-mount configurations, depending on the model.
Filtration Function: Removes suspended impurities and particles from pool water.
Cleaning System: Backwash function for cleaning the filtration media.
Applications: Residential and commercial swimming pools, depending on filter capacity.
Maintenance: Designed for convenient operation and routine maintenance.
Key Features and Benefits
Efficient filtration to help maintain clean and clear pool water.
Effective removal of suspended dirt and impurities.
Backwash capability for convenient filter cleaning.
Durable construction, depending on the selected model.
Easy operation and routine maintenance.
Available in different sizes and configurations to suit various swimming pool requirements.
Note: Filter diameter, sand capacity, flow rate, operating pressure, and connection sizes vary according to the specific Hayward model. Always follow the manufacturer’s installation and operating instructions.
FILTER HAYWARD 30 INCH
FILTER HAYWARD36 INCH
Provide a clean, level location The top of the filter must be no more than 1.5 m above the water level. Position the filter so
that the pipes, valve and drain plug are easily accessible. Servicing and wintering will then be easier.
2. Pump assembly
Attach the pump and its support to the filter according to the manufacturer’s instructions.
3 SIDE filter (valve on the side, Fig. 1):
Install the valve, taking care to ensure that the O-rings are correctly seated and screw in the nuts (14) by hand until the
valve/filter assembly is airtight.
Remove the cover (2) and fill the filter with water up to one third. Cover the diffuser (7) to prevent sand from entering it.
Then fill the filter with the quantity of sand indicated (2/3 to 3/4 of the height) and remove the diffuser protection. Clean off
any remaining sand and put the cover back in place (2). Connect the pipes to the valve. The pump must be connected to
the “PUMP” input, the water return to the “RETURN” output and the drain to the “WASTE” output.
4 TOP filter (valve on the top, Fig. 2):
Fill the filter with water up to one third. Cover the PVC tube to prevent sand from entering it. Fill the filter with the quantity
of sand indicated (2/3 to 3/4 of the height) and remove the tube protection. Clean off any remaining sand and fit the valve,
taking care to ensure that the O-ring is correctly seated in its housing. Connect the pipes to the valve. The pump must be
connected to the “PUMP” input, the water return to the “RETURN” output and the drain to the “WASTE” output.
Note 1: Do not use force when screwing the connection end-pieces into the valve fittings.
Note 2: Cover the male threads with teflon tape.
Note 3: After filling the filter with sand, thoroughly clean the neck thread, the cover seal and its seat.
Note: We advise you to put a layer of gravel (grain size 3 to 5 mm) up to the level of the laterals (covering them) and then
insert the filtering media up to 2/3 to 3/4 of the filter height. The layer of gravel ensures better drainage and facilitates back
washing.
STARTING UP
IMPORTANT: ALWAYS STOP THE PUMP BEFORE OPERATING THE MULTI-WAY VALVE.
1. Check that all connections are tight and that the filter contains just the right amount of sand.
2. Set the valve to “BACKWASH”. Always lower the handle before turning.
3. Start the pump as indicated by the manufacturer’s instructions. Check that water is flowing normally within the circuit.
WARNING: All suction and discharge valves must be open when the pump is started. Otherwise, there is a risk
of damage to property, serious injury, or death.
Once the water is flowing smoothly, let the pump run for at least another 2 minutes. This backwash is recommended to
eliminate any impurities or fine particles from the filtering sand.
4. Stop the pump and set the valve to “RINSE”. Restart the pump and let it run until the water becomes clear in the valve
circulation sightglass (about a minute).
5. Stop the pump and set the valve to “FILTER”. Restart the pump and filtering will start
Reviews
There are no reviews yet.